Equipment:
As if learning photography and lighting isn’t hard enough, at one point I thought it would be a wonderful idea to start doing underwater photography. As self-deprecating as this may seem, I am a sucker for a challenge and get bored easily so I needed something to keep my interest. As primarily a head shot photographer working with men in monkey suits all day in Washington DC is not necessarily the most creative outlet, even if it does pay the bills.
This lighting lesson walks through my experiences with a recent underwater shoot. There are always challenges to face with any photoshoot and this one was no different. Let me begin with some basic history on how I got started.
To start photographing underwater, I knew I needed equipment that could hold up to the constant exposure of salt, chlorine, and sun. I’ve used Photoflex products underwater in the past and they have held up beautifully so I started there.
The photo below shows my 32” diffusion disc, which is part of my 32″ 5-in-1 MultiDisc Reflector. At a recent shoot I clamped it to a C-Stand using my Photoflex LiteDisc Holder. This worked great to soften my underwater light source.

When it comes to underwater lighting in general, there’s only so much you can do with one on camera strobe. Also, triggering any lights off-camera can pose a challenge with the underwater environment. So when I needed a large diffuser for use in my underwater studio, I immediately thought of the Photoflex light modifier product line. You see, I LOVE off-camera, large light sources that give off soft, diffused light, but getting this look underwater isn’t easy. Enter the Photoflex LitePanel 77×77” Kit. This large, white, translucent panel allows me to get the quality of light I want for my underwater shots.
Here’s what the lighting set-up looked like for this shoot. You can see that I am using dry strobes to light my subject in the water. I placed the model very close to the LitePanel and then used the un-lit, deeper portion of the pool as my background.


In this outtake, you can see how close my model is to the LitePanel. The closer your model is to the light source, the softer the quality of light.

Getting the lights to fire though was another story. That was the tricky bit! I fired the dry strobes using their optical slaves, which were triggered by my on-camera flash, connected to the camera housing. But, my on-camera flash had to be on Manual mode for the dry strobes to pick up the optical signal to fire. I must have had close to 50 photos of my toes in the water as I was test firing trying to get the in water flash to talk to the dry ones. This was not the best way to start the shoot, but it taught me something and we finally got it working. So don’t be discouraged if something doesn’t work when you first try it. Keep at it and chances are, you’ll find a solution (thanks in part to the Google gods).
The image below illustrates the complete lighting set-up.

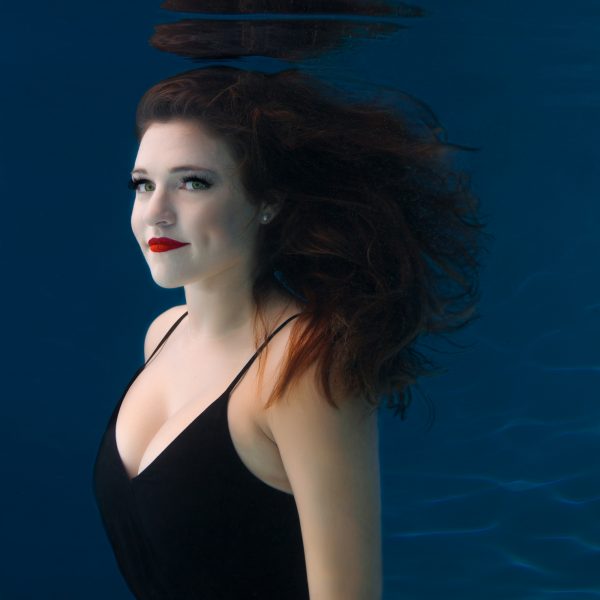
Here are the final images that we captured. I love the amazing, soft light I was able to attain in the water, using the Photoflex LitePanel.


Here’s a fun, three-minute video of our shoot, which shows this awesome lighting setup in action! Take a look and get started planning your next new adventure, whether it be in water or not.
—
Written and photographed by Kristina Sherk.
Newest Lessons,
Outdoor Portraits,
