
Equipment:
Lighting and photographing highly reflective objects can be pretty challenging, to say the least. But if you’re armed with the right lighting tools and some basic techniques, you can create some very professional-looking images with ease.
In this lesson, photographer Ben Clay tackles lighting an extremely reflective object and demonstrates the results of different tactics.
Background Materials
- 4×4′ sheet of black Plexiglas
- 4×2′ sheet of plywood
- 2 sawhorses
- 30×40″ sheet of black foam core
Setting up the Background
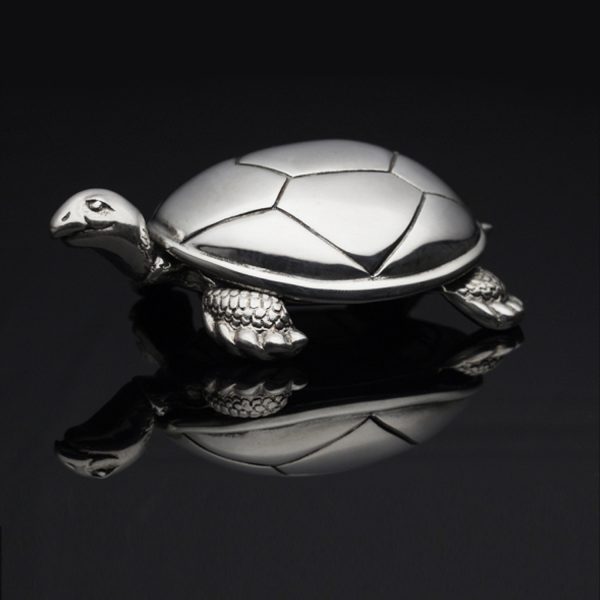
As with any product shot, the background you choose will make a big difference in your final results. I wanted to accentuate this turtle’s highly reflective finish by placing it on a reflective background. Since the turtle was light in tone, I chose black Plexiglas for a tonally dynamic look.
The background was simple and quick to put together. I placed two sawhorses in the corner of my small home office, a 2×4-foot sheet of plywood on top of the sawhorses for support and a 4×4-foot sheet of Plexiglas over the plywood. After placing the turtle on the Plexiglas, I mounted my camera to a tripod and framed up the shot.
Built-in Flash Lighting
To contrast against how most people would go about shooting an object like this, I set my camera to fully Auto mode, activated the built-in flash and took a shot.

The result is not much too look at. Although the overall shot is too dark, the main problem with this type of built-in flash lighting is that it renders its subjects flatly. By flat, I mean there’s a limited sense of dimension to the object. And since the flash is such a small light source, it typically creates high-contrast results with harsh, unnatural-looking shadows. Here, you can see the small reflection of the flash in the turtle, but the rest of the turtle is dark and shapeless.
Soft Box Lighting
Next, I deactivated the built-in flash, set up a Photoflex StarLite: medium digital kit on a Boom and started out by placing it about 2 feet directly above the turtle. I made sure my White Balance setting was set to tungsten (3200˚) to match the color temperature of the StarLite and took a shot.


Notice how the lighting is dramatically different from that of the first result. You can make out the reflection of the soft box in the center of the shell of the turtle and see that the reflection in the Plexiglas is much more defined. Still, there are areas of the turtle that are too dark to make out clearly, including the head and the edges of the shell.
To increase the amount of light reflecting into the top of the turtle, I lowered the soft box to within 6 inches of the Plexiglas and checked through the viewfinder to see the effect. (The beauty of working with continuous light is that you can see your lighting changes in real time!) The top of the turtle was now completely reflecting back the overhead soft box and the overall shape was much more defined.


This result is much improved over the previous shot and has a very clean, graphic look to it.
Double-Diffusion
Next, I wanted to increase the dimension and detail of the shot so that it wasn’t so black and white, so I diffused the overhead light even more by placing a Photoflex 39×72″ LitePanel frame in-between the turtle and the soft box. I placed one end of the frame on the back end of the Plexiglas and used a LiteStand and clamp to support the front end of the frame at about a 20-degree angle. I then positioned the soft box at the same angle as the LitePanel and placed it over the rear section of the frame to illuminate the LitePanel Fabric. This brightened the reflection off the Plexiglas.


Notice now how the background is now a neutral gray. This gray section is actually the reflection of illuminated LitePanel Fabric overhead, rendering the shape of the turtle more clearly. It also softens the edges of the reflections in the shell because the light cast onto the LitePanel has a smooth gradation to it.
The only part of the shot that was still too dark was the underside of the head of the turtle. Rather than adding a second light to the shot, I just moved the soft box toward the front end of the LitePanel to throw some light underneath the turtle.


The final shot reveals additional detail in the underside of the turtle’s head and overall the shot is tonally well-balanced. The background has darkened somewhat due to the repositioning of the overhead soft box, but this only helps to make the turtle stands out from the background. Also notice that gradation of light in the LitePanel Fabric reflects nicely into the shell of the turtle, giving it an added sense of dimension.
—
Written and photographed by Ben Clay.
Product/Still Life,
