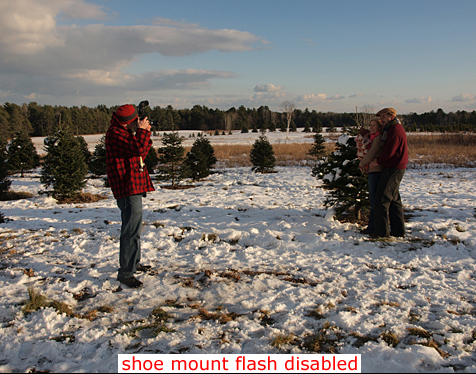
Want to bring that soft studio light outdoors, but don’t have a long enough extension cord? Not to worry. With a ShoeMount flash, remote triggers and a Photoflex® Small OctoDome, you can have that soft studio light wherever you go, electricity or no electricity.
This lesson examines some straightforward lighting techniques used during a recent outdoor family portrait session.
Topics Covered:
- The Concept
- The Backlit Approach
- Adding a Fill Flash
- Diffusing the Fill Flash
- Comparisons
- The End Result
The Concept
For this lesson, I wanted to go on location here in Maine to create an outdoor family portrait of my wife Tamara, our daughter Nola and myself for a holiday card. A light snow had fallen a couple of days prior to the shoot, which made for a nice wintery look.
After considering a few locations, Tamara and I decided upon a nearby Christmas tree farm. We spoke with the owners prior to the shoot and, fortunately for us, they were fine with us using their farm as a backdrop for our portrait. Here are a couple of views of the farm.


The Backlit Approach
Rather than bring a tripod along and shoot some self-timed shots, I asked my assistant, James, if he would help us out and be the photographer for this shoot. James, who is not only a good photographer in his own right–but who is also very accommodating–agreed to help us out. Once we arrived, we walked down with the gear and I found a backlit vantage point that I wanted to use.
To start, I asked James to take some shots of us with the built-in flash disabled. With respect to exposure, I told him I didn’t want the sky or any other part of the frame overexposed and that that should take priority over anything else. He understood that I wanted to use these results as comparisons to the shots we would take later. Here’s one of the results from that series.

As you can see, James did a good job in exposing for the background. We, on the other hand, were noticeably underexposed due to our backlit positioning. This is a good example of the limited dynamic range most cameras have, as compared to that of the human eye. In many sunlit instances, such as this, you have to compromise with exposure one way or the other if you’re not using supplemental lighting.
Adding a Fill Flash
To remedy the exposure on us, James could have either opened up the overall exposure or introduced some additional lighting. Opening up the overall exposure would have overexposed the sky, so instead he opted to attach a ShoeMount flash to the camera to serve as a fill light. Here’s one of the results from that series.

Here, you can see that the overall exposure was better balanced. The background was at the same exposure level as it was before, but now the light from the ShoeMount flash helped to illuminate the three of us. This is a common lighting strategy and many are happy with the effects it produces.
However, if you look closely, you’ll notice that the quality of light from the fill flash is relatively unnatural looking. In fact, it almost looks as if there are two suns in this scene–one illuminating us from behind and one illuminating us from the front. The thing that really gives away the fact that a flash was used here is the quality of light it produced, which is considered “hard.” Notice, for example, how hard the shadows appear cast from my hat. Were this a more diffused light, these shadows, and the overall quality of light, would be much softer.
Diffusing the Fill Flash
Well, it just so happened that “soft” light is what we happened to bring with us, so we decided to set that up. Inside the TransPac™ case was a Small OctoDome3 Kit, which is designed to accommodate a ShoeMount flash. Below, you can see the SoftBox, LiteStand and hardware that comes with this kit.
Once James had the kit set up, he attached the wireless receiver to the Adjustable ShoeMount Hardware, mounted the wireless transmitter to the hot shoe of the camera and tested out the connection. Once everything was synced up, we set the kit off to the left of where we would be standing.


At this point, it was getting a little cold outside, as the sun was getting ready to set. Nola was understandably getting a little fussy, so we knew we had to wrap things up soon. After bundling her in a few blankets and shielding her from the wind in her stroller, Tamara and I put on our overcoats and got ready for the final shots.


After a few minutes, we brought Nola back out of the stroller and James took a final series of shots with the OctoDome. Here’s our favorite of the bunch, despite Nola’s obvious contempt for the whole ordeal.
As you can see, the quality of the lighting here is dramatically different than it was in the previous shot. There is still a directional light illuminating the front of us, but it is nicely diffused, much more flattering, and does not draw attention to itself.
Comparisons
Below, you can see a side-by-side comparison of the results.
The End Result
Later on that evening, I uploaded all the images onto my computer and decided to see if I could find a good card layout for the final image. I went onto Shutterfly, perused their card layouts, and decided on this one, which I thought really tied in nicely with our final result.

As always, remember to experiment with your lighting and have fun in the process!
—
Written by Ben Clay and photographed by James Helms.
Outdoor Portraits,
